| BUILDING A PHOTOGRAPH STUDIO AT HOME |
 |
|
Whether you are a hobbyest with a penchant for family portraits, or a new professional tired of paying extra rent, building a home photography studio is a good idea. You may be able to commandeer an entire room, or you might have to share the spare bedroom. You can spend less than $500, or a few thousand. But whatever your space restraints or budget limitations, there are few general things your studio will require.
|
SUMMARY
This article discusses the basics of setting up a photography studio in your home. For ease of dicussion, we have assumed the photographer already has access to the necessary cameras, lenses, and tripods.
| THE ROOM |
SURROUNDINGS |
LIGHTING |
ACCESSORIES |
- Size
- Natural Light
- Power
- Ventilation
|
|
- Flash/Strobe Lights
- Continuous Lights
- Modifiers
|
- Ladder/Stools
- Props
- Furniture
- Additional backdrops
|
|
| THE ROOM
|
|
Naturally, the first requirement of any home studio is the space in which to arrange it. A dedicated room is ideal, though sharing a room with a dual purpose is also an option. There are a few things to consider when selecting the best space.
SIZE
Bigger is better when it comes to a studio room. While you may not use the whole space, it is best not to be limited by close walls, pillars, or low ceilings. If at all possible, a room at least half as wide as it is long is ideal to ensure you are not limited in focal ranges. You should be able to use the lens that best suits the shot, not the only one that allows you to get it all in because you're backed against a wall.
A high ceiling is perhaps the quality most easily parted with, depending on what you plan to photograph. If you shoot human subjects standing up, you may occasionally need to light them from above and 8 foot ceilings will make this quite difficult. If, however, you primarily shoot product images, seated portraits, or small children, ceiling height may not be as important.
A basement can be a great option for a studio, for the reason discussed next. If the ceiling is high enough, the vertical supports common in many below-ground rooms may be an issue. They are possible to work around, but again, you do not want to be forced to move your lighting stands or your camera from the perfect position due to a concrete pillar.
One professional photographer states their ideal for shooting portraits is a minimum space of 17x10 feet.
NATURAL LIGHT
Natural light can be both a positive and negative presence in a home studio. If you like to shoot with natural light, a large, north-facing window can be a huge coup for your studio. If you are transforming your garage, that rising door can provide a whole array of options. If, however, you prefer to use flash or hot lights, windows can be a detriment.
This is another reason a basement studio may be ideal. Windows are often small, and will be easier to cover completely. If you are not using natural light, you will want your studio space to be pitch black when no lights are on. This means blocking the windows completely.
POWER
You will need a number of extension cords and surge protectors for all the equipment in your studio. For the safest result, your chosen room should have a number of power outlets. You don't want to be plugging all your equipment into one or two outlets, or be forced to run extension cords out the door to neighboring hallways and other rooms.
VENTILATION
This is not a requirement, but it is important to remember spotlights get extremely hot. This means, especially during the warmer months, your studio may get quite warm while you are shooting. Since your windows will most likely be blocked, they are not a reliable source of air movement.
If you are building your home with a studio in mind, or if you have a choice of rooms, one with ventilation is a good idea.
|

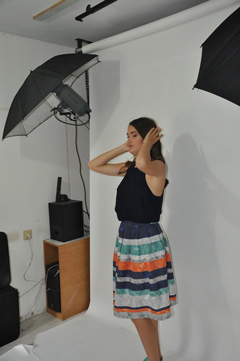
Your studio may be a shared space
|
| THE SURROUNDINGS
|
|
WALLS
Even if you are planning to have a host of wide backdrops, painting the walls of your studio isn't a bad idea. White is a good option, since it will reflect the light of a flash or lamp evenly at all points. Other photographers have suggested the gray of a graycard - it flatters most skintones - or even one wall in black for your moodier shots.
FLOORS
A hard wood, cement, or seamless linoleum floor is ideal for the studio. Tile can cause stands to wobble if their legs are placed in the cracks. Carpet also causes stability issues and paper backdrops (to be discussed next) will be easily punctured by the soft surface. If you have chosen to paint your walls white or another color, continuing this color (or one slightly darker for contrast) onto the floor is an option.
BACKDROPS
Chances are, even if your walls and floor are a uniform color, you will need a few backdrops for different styles of photo shoots. There are a few different options for this accessory, which range in price from $20 to hundreds.
Paper Backdrops
Paper is a common choice for backdrops - you've likely seen them in family portrait studios. This thick, kraft-like paper comes in large rolls that are generally hung above the models' heads.
Pros:
- It is relatively inexpensive, and comes in a wide range of colors, patterns, lengths, and widths.
- It hangs flat and smooth, and does not need to be ironed or washed.
- If it rips or gets dirty, you simply tear off that part and unroll more.
Cons:
- It can be rather wasteful, depending on how much you use.
- The rolls are heavy, so you will likely need a dispenser made for that purpose.
- Because it is not a cloth that can simply be folded up and piled away. it is more space-consuming to store.
Cloth Backdrops
Cloth is another common option. While it may also come rolled, cloth backdrops are more often used as sheets. They can be equipped with slats or a pocket through which a hanging bar can be slid.
Pros:
- Cotton or polyester sheets can be relatively inexpensive.
- You have a choice of texture. Velvet has excellent light absorbing qualities, while cotton is smooth, but soft.
- When not in use, they can be folded and put away, taking up very little space.
- They can be reused again and again.
- Most fabrics are quite light, and can be hung with a standard curtain rod.
Cons:
- If they get dirty, they must be washed, which can alter the color over time.
- They have a tendency to get wrinkled and require ironing. They may also wave when hung.
- They may need to be weighted at the bottom, and basic fabric sheets will require sewing to create the hanging pocket.
Seamless Wall
A third, and perhaps less practical option is the seamless wall. This rolling or otherwise moveable painted board or actual piece of wall provides a perfectly smooth, flat backdrop and multiple boards allow for interchangeable colors.
A 9-foot length is ideal - especially if you will be shooting family portraits or action - but even a 4.5-foot wall works well for close portraits or product images.
You'll likely require more space for a backdrop like this which can neither be folded nor rolled up. Depending on what you will be shooting, however, a seamless wall may be worth the work.
|
Painting both the floor and wall white create a continuous expanse
A white backdrop and studio lights
|
| LIGHTING
|
|
|
Assuming you will not be exclusively using natural light - or that you have blocked the windows in your studio - you will of course require lighting equipment.
It is extremely easy to spend thousands of dollars on lighting equipment in no time at all, but unless you have that in your budget, that is an unnecessary expense. It is possible to get a good, basic lighting setup for under $200, you just need time to hunt, and patience.
If you're just starting out and don't have a precise list of exactly what you'll need, a basic lighting kit is the way to go. There are kits which include two lamps, two stands, two umbrellas, and even a carrying case for less than $100. While they may not be top quality, unless you are travelling or using them excessively, they should last until you have a bit more seed money to invest.
What follows is a descriptive list of the different lighting equipment you will come across when setting up your studio. While all these items are not required, basic understanding of them will aid in your decision-making process.
COLOR TEMPERATURE AND WHITE BALANCE
Color temperature refers to the "wash" that accompanies your photograph. If you are shooting under fluorescent light, you may notice a greenish cast to your subjects and images. Under incandescent lights, colors become a bit orange. Though sunlight is often considered a pure form of light, even it is not exempt from changing the color. Under natural shadows, colors appear a bit blue. At sunset, everything has a golden cast.
This is why it is important to understand white balance. Simply put, measuring white balance allows you to make the whites in your image (and therefore the other colors as well) truly white, regardless of the lighting conditions. In a perfect instance, the same photo taken with natural light, fluorescent light, and tungsten would look exactly the same.
Once you have determined a good white balance setting with a few test shots, you should not have to change the setting as long as you are shooting in that room with that light. If you were outdoors for a long period of time, however, you would want to re-check the balance as the sun moves overhead.
TYPES OF BULBS
In order to choose the correct white balance setting, it helps to know what kind of lights you are using in your studio. The following are the most common bulb types for studio lighting.
Fluorescent: These energy efficient lights that are affordable and easy to find. However, they don't give out a ton of light - usually a maximum of 100 watts. Therefore, they may not be bright enough to light your studio on their own.
LED: Energy efficient LEDs last a long time and are lightweight. Unfortunately, they are not very bright, though this may change as the technology is still evolving. LED lights are still quite expensive.
Tungsten: Tungsten are popular due to their high output level. However, they burn extremely hot and can quickly warm up a small studio, not to mention be dangerous. They're not expensive to replace, but you must be wary of color temperature when shooting pictures under them.
FLASH/STROBE LIGHTS
Flash lamps, as their name implies, are not used for continuous lighting. They are rigged to your camera - either wired or wirelessly - and are triggered when you press the shutter.
Depending on the type of flash lamp and the settings, the flash may be short, long, or repeated multiple times. They're ideal for capturing and freezing action shots.
While this is a great way to save on electricity and cut down on the above mentioned heat issue, it is not an ideal option for every situation. Continuous lighting is preferred by most photographers for still photography. If you are shooting models, however, flash is considered the better method, as the quick burst of light reduces blur in animate subjects.
CONTINUOUS LIGHTS
Continuous lights remain on while your take your photographs without flash (generally). They may be outfitted with various modifiers, just like flash lamps but do not need to be connected to your camera. Most photography studios have at least three lamps. These are strategically placed to avoid strong shadows.
The most common arrangement for studio lighting is one to the left and in front of the subject, one to the right and in front, and possibly a third behind and to the side or, in certain situations, below and pointing up onto the subject. By balancing out the lighting on each side of the model, shadows can be greatly reduced, if not eliminated, hair and cheekbones can be flatteringly highlighted, and the much sought-after "window box" reflection in the eye can be achieved.
MODIFIERS
- Diffuser box: Also called a White Box, this is a small accessory essential for product photography. The wire or wooden box frame is covered with white fabric or paper which allows the light to filter through, but eliminates shadows and reflections. Diffuser boxes can be purchases or made quite easily.
- Snoots: A snoot is a lighting attachment that fits over the lamp to focus the beam, allowing to photographer to control precisely where the light will fall. Most are cylindrical in shape, though some may be rectangular.
- Flags: Used to block light or cast a specific shadow, a flag is generally a wire-framed rectangle with a non-reflective black material stretched within. Their size ranges from a few inches square to numerous feet square.
- Reflectors: A reflector is any panel that has a reflective material - such as high shine cloth or foil - stretched across its surface. They may be hand-held or affixed to a stand. The umbrellas discussed below are a type of reflector. This modifier is used to redirect the light onto, or away from, the subject.
- Soft boxes: A soft box sits over the lamp, serving as a diffuser box for the light itself. They are generally made from material stretched over a metal frame. The back and sides are black and non-reflective, while the front panel is a semi-translucent white material. Like a diffuser box, a soft box will minimize shadows and reflections, as the bulb itself is concealed.
- Umbrellas: Umbrellas look just like their rainy-day namesake. They have a reflective interior which diffuses and redirects the light when placed in front of the lamp. Generally, the light is turned away from the subject, with the reflective side of the umbrella facing the subject. When the lamp is lit, the softened, reflected light bounces off the umbrella to light the subject.
|
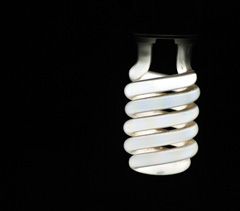
Energy-saving fluorescent bulb
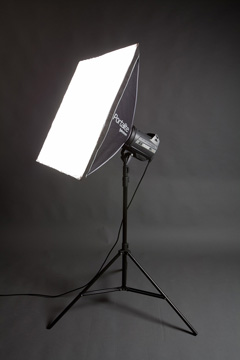
A soft box over a studio light
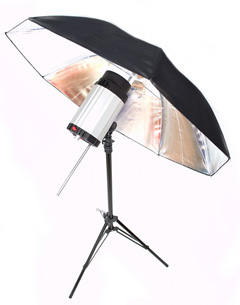
Lighting umbrella
|
| OTHER ACCESSORIES
|
|
|
What is outlined above are the basic requirements for a home photography studio. Once you have settled into your new workspace, you may consider purchasing some additional pieces to really outfit the space (or commandeering from around the house). The extra products you require depend on your photographic intentions.
Ladder/Stool: Besides allowing you to reach and angle any overhead lights, a ladder is a great tool for getting some really unique shots during a photo shoot. If the ceilings in your studio are quite low, you may only need a stepladder.
Diffuser box/White box: As discussed above, a diffuser box softens the light around an object to eliminate harsh shadows and reflections. If you do product photography, this accessory is essential.
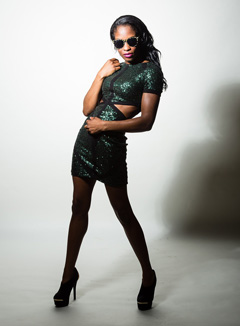
Props: Are you planning to take single portraits, family photos, or pictures of children? If you are often working with people who don't model professionally, props are a great tool for relieving their nerves and making them feel relaxed and comfortable. Silly sunglasses, signs, or hats are great for adults, while a hoard of fluffy toys are a must for kids.
Furniture: If you are shooting people, you will want at least a few pieces of furniture. A simple stool is a popular piece, and can easily be draped with fabric that matches the background for an "invisible" effect. A small couch or lounge, or a very unique statement piece may also be useful for artistic shots.
Mirrors: Essentially another prop, a mirror can result in some very interesting and unique images. Use them to reflect the light, both the front and back of the model in a fashion shoot, or get really creative by having your subject hold or stand on a reflective surface.
Additional backdrops: Basic black, white, and gray backdrops are useful and extremely versatile, but once your business has begun to expand, you may want to add in some patterned or boldly colored pieces for your edgier shoots. Space can often be an issue for a home studio, so don't let your eyes be bigger than your utility closet!
|
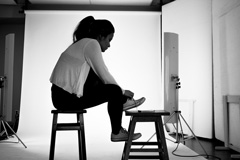
Stools make good studio props
|
|
Whatever your photography plans, having a studio in your home can save you from rainy days, too-bright sunlight, and rental costs. Hunt for deals, don't be afraid to buy second-hand, and take your time when building your studio. In the end, you'll have a workspace of which you can be proud!
Have questions about any of our photography services or products? Don't hesitate to contact us. Our knowledgeable staff is always happy to assist with answers, advice, or suggestions.
|
|

|


|
USA Giclee On Canvas, Fine Art Printing - Art Scanning & Reproductions - Handmade Oil Paintings - Custom Wood Panels, Metal Picture Framing - Block/Plaque Mountings, Large Format Dry Mounting & Lamination - Art Supplies: Stretcher Bars, Cradled Wood Panels and Artist Canvas - Collages On Canvas - Plexi/Acrylic Face Mounts - Block Acrylics, Fabric Printing, Dye Sublimation - Cityscape Skyline Prints, Resin, Photo Gifts and more...
Frame Assembly Guide - Dovetail System
USA Laser Engraving & Cutting Services
|
|
© 2002-2024 - KeenART Media Ltd.
|
|
| |
|